The Ultimate Guide: How to Make a Borg Costume
Are you a fan of Star Trek and fascinated by the Borg? Do you want to transform into one of the iconic cyborgs for Halloween or a cosplay event? Look no further! In this guide, we will walk you through the step-by-step process of creating your very own Borg costume.
Step 1: Gather Your Materials
The first step in creating a Borg costume is gathering all the necessary materials. Here's a list of what you'll need:
- Black bodysuit or black clothing
- Silver and black spray paint
- Assorted electronic components (old computer parts, wires, circuit boards)
- Hot glue gun
- Black gloves
- Black boots
- Black contact lenses (optional)
Once you have all these materials ready, you can proceed to the next step.
Step 2: Create the Borg Armor
To create the iconic Borg armor, you will need to customize your black bodysuit or clothing. Follow these steps:
- Lay out your bodysuit or clothing on a flat surface.
- Using the silver spray paint, create a distressed and worn-out look on the fabric. This will give it a metallic appearance.
- Allow the spray paint to dry completely before proceeding.
- Using the black spray paint, add more depth to the metallic look by spraying certain areas of the bodysuit or clothing.
- Once the paint is dry, start attaching the electronic components to the fabric using a hot glue gun. Be creative and arrange them in a way that resembles the Borg's cybernetic implants.
- Make sure to leave some areas uncovered to give the costume a more realistic and authentic feel.
After completing these steps, you will have your very own Borg armor ready to wear!
Step 3: Complete the Look
Now that you have your Borg armor, it's time to complete the look with the following accessories:
- Black gloves: Choose a pair of black gloves to match the rest of your costume. This will add to the overall sleek and cybernetic appearance.
- Black boots: Look for a pair of black boots that complement your costume. The boots should be comfortable to wear for extended periods.
- Black contact lenses (optional): If you want to go all out and truly transform into a Borg, consider wearing black contact lenses. These will give your eyes an otherworldly look.
Once you have all these accessories, put them on along with your Borg armor. You are now ready to assimilate any party or event!
Step 4: Enhance Your Costume with Makeup
To truly bring your Borg costume to life, consider enhancing it with some makeup. Here are a few suggestions:
- Pale complexion: Use a pale foundation to give your skin a more robotic appearance.
- Metallic accents: Add silver or metallic eyeshadow around your eyes to create a cybernetic effect.
- Dark lips: Apply dark lipstick or lip stain to give your lips a more menacing look.
With these makeup enhancements, your Borg costume will be even more impressive and attention-grabbing.
Step 5: Strike a Pose and Share Your Costume
Once you have successfully completed your Borg costume, it's time to strike a pose and share your creation with the world! Take some photos in different poses and angles to showcase the details of your costume.
You can share your photos on social media platforms like Instagram, Twitter, or Facebook. Don't forget to tag @costumeshopofficial and use the hashtag #borgcostume. We would love to see your incredible creation!
Looking for More Costume Ideas?
If you're looking for more costume ideas or need to purchase any additional accessories for your Borg costume, be sure to visit our online store at www.costume-shop.com. We have a wide range of costumes and accessories to make your Halloween or cosplay event unforgettable!
So what are you waiting for? Start gathering your materials, get creative, and transform into a Borg today. Resistance is futile!
Featured collection


Original price
$27.95
-
Original price
$27.95
Original price
$27.95
$27.95
-
$27.95
Current price
$27.95
Sexy Post Office Girl | Costume-Shop.com
In stock
Attention all aspiring letter carriers and mail enthusiasts! Prepare to deliver a package of seductive style and naughty charm with our Sexy Post O...
View full details
Original price
$27.95
-
Original price
$27.95
Original price
$27.95
$27.95
-
$27.95
Current price
$27.95


Original price
$110.95
-
Original price
$110.95
Original price
$110.95
$110.95
-
$110.95
Current price
$110.95
Northern Warrior Costume | Costume-Shop.com
Low stock
Upgrade your costume game to legendary status with the Northern Warrior Costume! Designed for rugged adventurers and fearless warriors of the North...
View full details
Original price
$110.95
-
Original price
$110.95
Original price
$110.95
$110.95
-
$110.95
Current price
$110.95
Original price
$34.95
-
Original price
$34.95
Original price
$34.95
$34.95
-
$34.95
Current price
$34.95
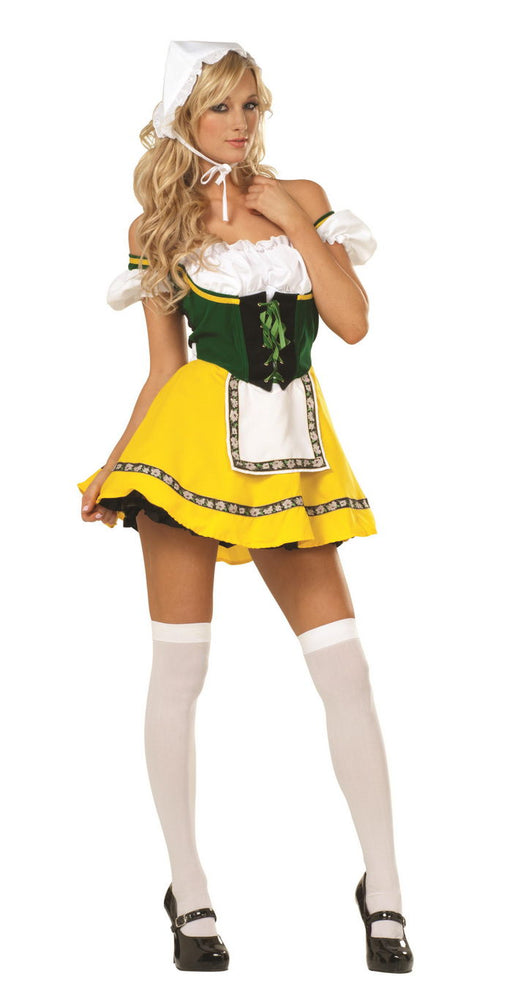
Beer Garden Babe Oktoberfest | Costume-shop.com
Low stock
🇩🇪 Step into the Festivities with Bavarian Charm! Embrace the spirit of Oktoberfest in the Beer Garden Babe Costume from www.Costume-shop.com. Perf...
View full details
Original price
$34.95
-
Original price
$34.95
Original price
$34.95
$34.95
-
$34.95
Current price
$34.95
Original price
$31.95
-
Original price
$31.95
Original price
$31.95
$31.95
-
$31.95
Current price
$31.95
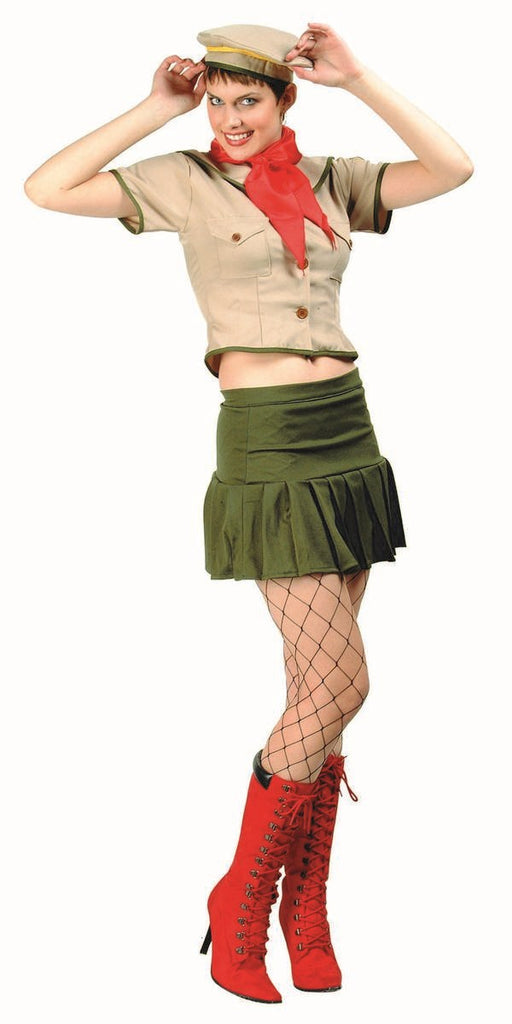
Sexy Girl Scout | Costume-Shop.com
In stock
Get ready to sell some irresistibly delicious cookies and turn heads with our Sexy Girl Scout Costume! This playful and alluring ensemble is perfec...
View full details
Original price
$31.95
-
Original price
$31.95
Original price
$31.95
$31.95
-
$31.95
Current price
$31.95
Original price
$66.95
-
Original price
$66.95
Original price
$66.95
$66.95
-
$66.95
Current price
$66.95
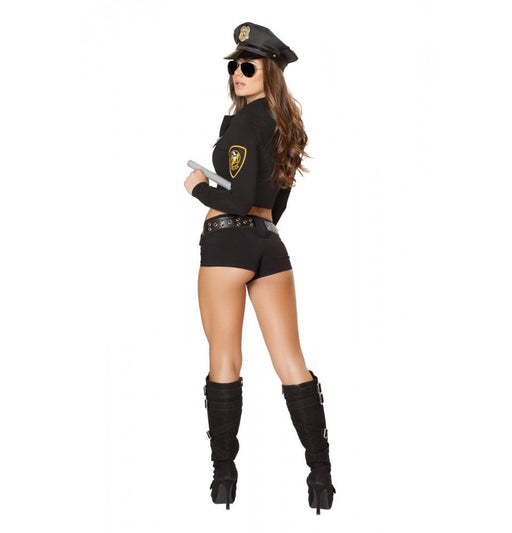
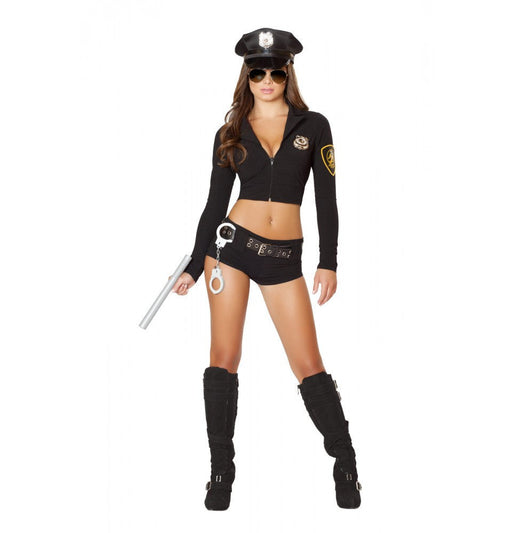
Sexy Police Officer Hottie | Costume-Shop.com
Low stock
🚓 Enforce Fun with a Dash of Flair! Step into the role of authority with the Sexy Police Officer Hottie Costume from www.Costume-shop.com. Designed...
View full details
Original price
$66.95
-
Original price
$66.95
Original price
$66.95
$66.95
-
$66.95
Current price
$66.95
Leave a comment