How to Make a Spiderman Suit
Welcome to the Costume Shop blog! If you're a fan of the friendly neighborhood Spiderman and want to dress up as your favorite superhero, you've come to the right place. In this blog post, we'll guide you through the process of making your very own Spiderman suit. Whether it's for Halloween, a cosplay event, or just for fun, creating your Spiderman suit will surely make you feel like a true superhero!
Materials You'll Need
Before we dive into the step-by-step instructions, let's go over the materials you'll need to create your Spiderman suit:
- Red and blue stretchy fabric
- Black fabric paint
- Black fabric marker
- Spiderman logo stencil
- Elastic
- Sewing machine or needle and thread
- Scissors
Step 1: Taking Measurements
The first step in making your Spiderman suit is to take accurate measurements of your body. Measure your chest, waist, hips, inseam, and arm length. These measurements will help you determine the size and shape of the suit.
Step 2: Cutting the Fabric
Once you have your measurements, lay out the red and blue stretchy fabric on a flat surface. Use your measurements to draw and cut out the pieces for the suit, including the front and back panels, sleeves, and pants. Make sure to leave extra room for seam allowances.
Step 3: Sewing the Suit
Using a sewing machine or a needle and thread, stitch the pieces together to form the Spiderman suit. Start by attaching the front and back panels together at the shoulders and sides. Then, sew on the sleeves and pants. Remember to leave openings for your head, arms, and legs.
Step 4: Adding the Spiderman Logo
To make your Spiderman suit truly authentic, you'll need to add the iconic Spiderman logo. Place the Spiderman logo stencil on the chest area of your suit and secure it in place. Use black fabric paint to carefully fill in the stencil. Once the paint is dry, remove the stencil and outline the logo with a black fabric marker for added definition.
Step 5: Attaching Elastic
To ensure a snug fit, attach elastic bands to the wrists, ankles, and waist of your Spiderman suit. This will help keep the suit in place while you're wearing it and give it that authentic superhero look.
Step 6: Trying on Your Spiderman Suit
Once you've completed all the steps, try on your homemade Spiderman suit and make any necessary adjustments. Check for any loose seams or areas that need reinforcement. If everything looks good, you're ready to put on your mask and swing into action!
Remember, if you prefer to skip the DIY process and want a ready-made Spiderman suit, you can always check out our Costume Shop. We offer a wide selection of high-quality Spiderman costumes that are perfect for any occasion.
So go ahead and unleash your inner superhero with your very own Spiderman suit. Whether you choose to make it from scratch or purchase one, wearing a Spiderman suit is sure to make you feel powerful, confident, and ready to save the day!
Featured collection


Original price
$27.95
-
Original price
$27.95
Original price
$27.95
$27.95
-
$27.95
Current price
$27.95
Sexy Post Office Girl | Costume-Shop.com
In stock
Attention all aspiring letter carriers and mail enthusiasts! Prepare to deliver a package of seductive style and naughty charm with our Sexy Post O...
View full details
Original price
$27.95
-
Original price
$27.95
Original price
$27.95
$27.95
-
$27.95
Current price
$27.95


Original price
$110.95
-
Original price
$110.95
Original price
$110.95
$110.95
-
$110.95
Current price
$110.95
Northern Warrior Costume | Costume-Shop.com
Low stock
Upgrade your costume game to legendary status with the Northern Warrior Costume! Designed for rugged adventurers and fearless warriors of the North...
View full details
Original price
$110.95
-
Original price
$110.95
Original price
$110.95
$110.95
-
$110.95
Current price
$110.95
Original price
$34.95
-
Original price
$34.95
Original price
$34.95
$34.95
-
$34.95
Current price
$34.95
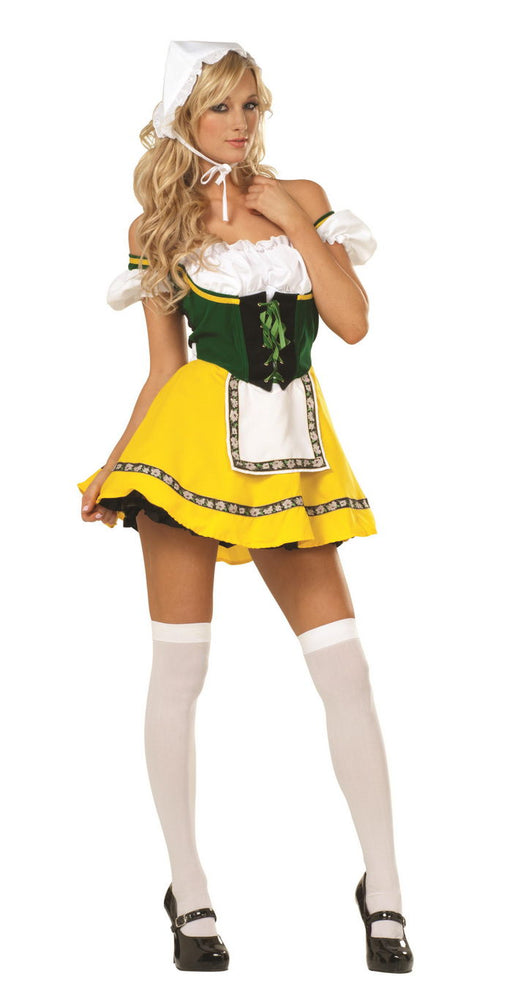
Beer Garden Babe Oktoberfest | Costume-shop.com
In stock
🇩🇪 Step into the Festivities with Bavarian Charm! Embrace the spirit of Oktoberfest in the Beer Garden Babe Costume from www.Costume-shop.com. Perf...
View full details
Original price
$34.95
-
Original price
$34.95
Original price
$34.95
$34.95
-
$34.95
Current price
$34.95
Original price
$66.95
-
Original price
$66.95
Original price
$66.95
$66.95
-
$66.95
Current price
$66.95
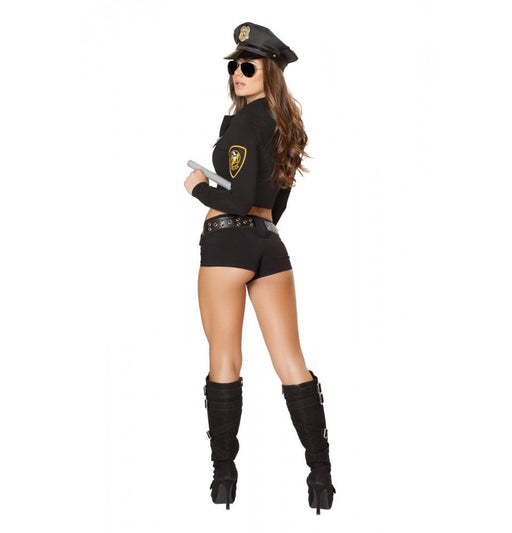
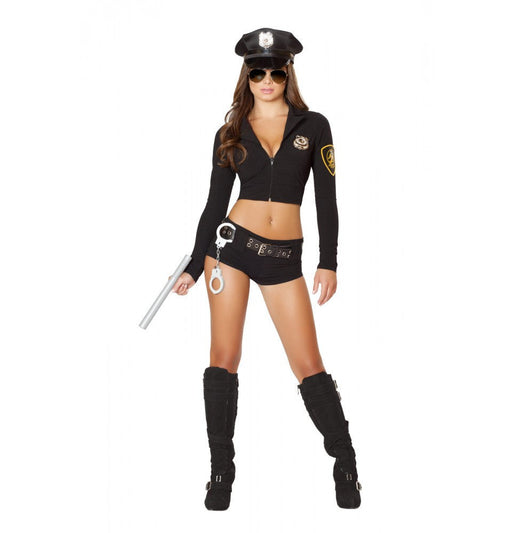
Sexy Police Officer Hottie | Costume-Shop.com
Low stock
🚓 Enforce Fun with a Dash of Flair! Step into the role of authority with the Sexy Police Officer Hottie Costume from www.Costume-shop.com. Designed...
View full details
Original price
$66.95
-
Original price
$66.95
Original price
$66.95
$66.95
-
$66.95
Current price
$66.95
Original price
$31.95
-
Original price
$31.95
Original price
$31.95
$31.95
-
$31.95
Current price
$31.95
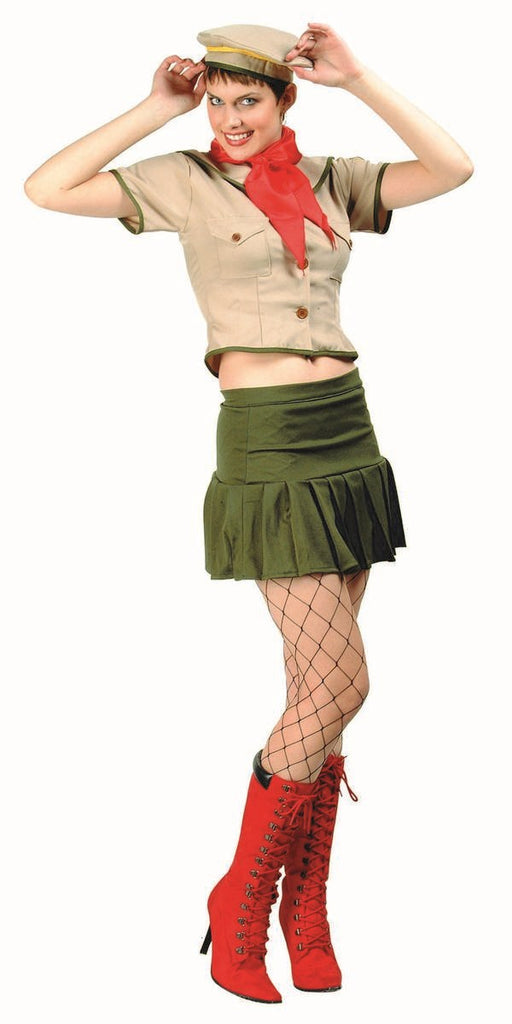
Sexy Girl Scout | Costume-Shop.com
In stock
Get ready to sell some irresistibly delicious cookies and turn heads with our Sexy Girl Scout Costume! This playful and alluring ensemble is perfec...
View full details
Original price
$31.95
-
Original price
$31.95
Original price
$31.95
$31.95
-
$31.95
Current price
$31.95
Leave a comment