How to Make a Bustle Tutu
Tutus are a versatile and fun costume piece, perfect for parties, performances, or just adding a whimsical touch to your everyday outfits. While traditional tutus are known for their full and fluffy skirts, a bustle tutu offers a unique twist with its layered and ruffled design. In this tutorial, we will guide you through the process of making your own bustle tutu, allowing you to unleash your creativity and showcase your personal style.
Step 1: Gather Your Materials
Before you begin, make sure you have all the necessary materials:
- Tulle fabric in your desired colors
- Elastic waistband
- Scissors
- Measuring tape
- Sewing machine or needle and thread
- Pins
- Ruler
Step 2: Measure and Cut the Tulle
Start by measuring your waist or the desired length of the tutu. Add a few inches to the measurement to allow for the gathering and tying of the tulle strips.
Next, cut the tulle fabric into strips. The width of the strips can vary depending on your preference, but a width of around 4-6 inches is recommended. The length of the strips should be twice the desired length of the finished tutu, as they will be folded in half during the assembly process.
Repeat this step for each color of tulle you plan to use in your bustle tutu.

Step 3: Attach the Tulle to the Waistband
Take one strip of tulle and fold it in half. Place the folded end of the strip under the elastic waistband, creating a loop at the top. Pull the loose ends of the strip through the loop and tighten to secure it in place. Repeat this process with the remaining tulle strips, spacing them evenly around the waistband.

Step 4: Create the Bustle Effect
To achieve the bustle effect, you will need to layer and arrange the tulle strips. Start by pushing all the strips towards one side of the waistband. Take the first strip and bring it towards the opposite side, securing it in place with a pin. Repeat this process with each strip, alternating sides as you go. This will create a cascading and ruffled look.

Step 5: Adjust and Secure
Once you are satisfied with the arrangement of the tulle, try on the tutu to ensure it fits comfortably and falls at the desired length. Make any adjustments necessary by moving and rearranging the tulle strips.
To secure the tulle in place, sew a few stitches through each layer of tulle and the waistband. This will prevent the tulle from shifting or coming loose during wear.

Step 6: Complete the Tutu
After securing the tulle, trim any excess fabric or uneven edges to give your bustle tutu a clean and polished look.
Your bustle tutu is now complete and ready to be showcased at your next event or gathering! Pair it with a corset or a fun top for a unique and stylish costume.
Conclusion
Creating your own bustle tutu allows you to unleash your creativity and design a unique piece that reflects your personal style. With just a few materials and some simple steps, you can make a stunning costume accessory that is sure to turn heads.
If you're looking for more costume ideas and accessories, be sure to check out our store at https://www.costume-shop.com/. We offer a wide range of premade costumes and accessories to suit any occasion.
Featured collection


Original price
$27.95
-
Original price
$27.95
Original price
$27.95
$27.95
-
$27.95
Current price
$27.95
Sexy Post Office Girl | Costume-Shop.com
In stock
Attention all aspiring letter carriers and mail enthusiasts! Prepare to deliver a package of seductive style and naughty charm with our Sexy Post O...
View full details
Original price
$27.95
-
Original price
$27.95
Original price
$27.95
$27.95
-
$27.95
Current price
$27.95


Original price
$110.95
-
Original price
$110.95
Original price
$110.95
$110.95
-
$110.95
Current price
$110.95
Northern Warrior Costume | Costume-Shop.com
Low stock
Upgrade your costume game to legendary status with the Northern Warrior Costume! Designed for rugged adventurers and fearless warriors of the North...
View full details
Original price
$110.95
-
Original price
$110.95
Original price
$110.95
$110.95
-
$110.95
Current price
$110.95
Original price
$34.95
-
Original price
$34.95
Original price
$34.95
$34.95
-
$34.95
Current price
$34.95
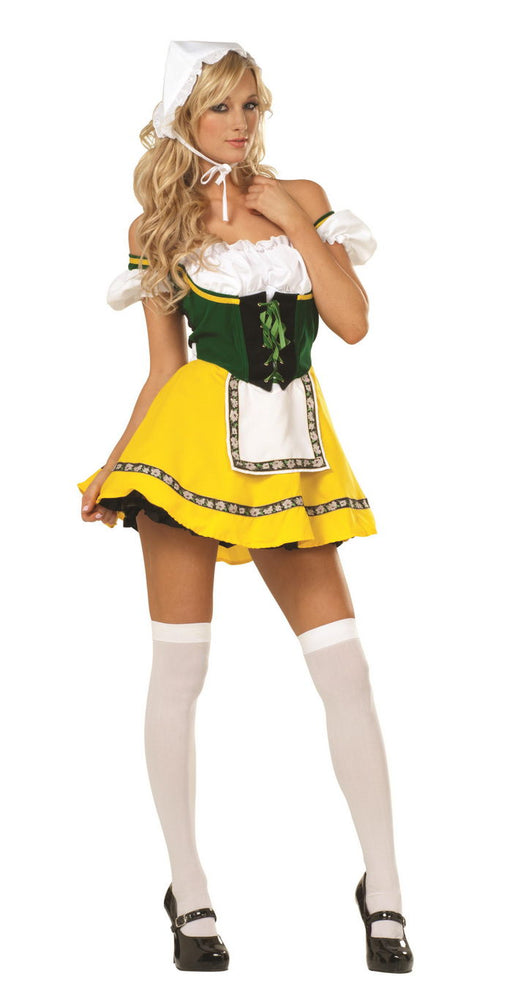
Beer Garden Babe Oktoberfest | Costume-shop.com
In stock
🇩🇪 Step into the Festivities with Bavarian Charm! Embrace the spirit of Oktoberfest in the Beer Garden Babe Costume from www.Costume-shop.com. Perf...
View full details
Original price
$34.95
-
Original price
$34.95
Original price
$34.95
$34.95
-
$34.95
Current price
$34.95
Original price
$33.95
-
Original price
$33.95
Original price
$33.95
$33.95
-
$33.95
Current price
$33.95
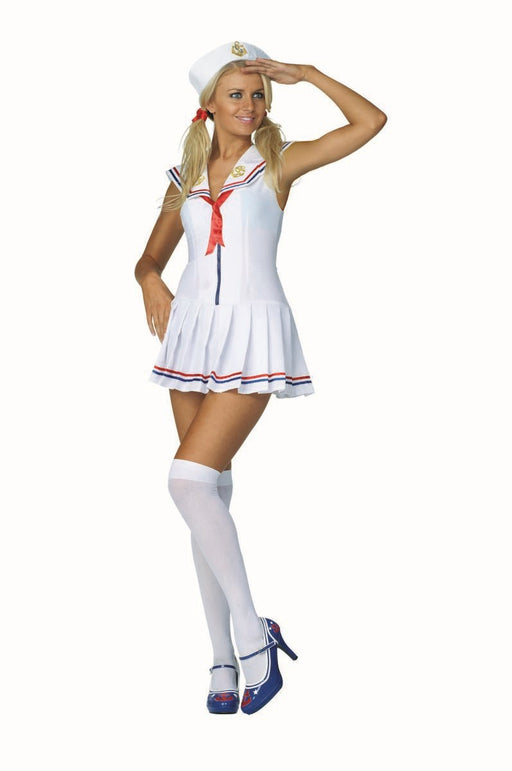
Sailor's Delight | Costume-Shop.com
In stock
🚢 Navigate the High Seas of Fashion! Command attention at your next party with the Sailor's Delight Costume from www.Costume-shop.com. Perfect for ...
View full details
Original price
$33.95
-
Original price
$33.95
Original price
$33.95
$33.95
-
$33.95
Current price
$33.95
Original price
$31.95
-
Original price
$31.95
Original price
$31.95
$31.95
-
$31.95
Current price
$31.95
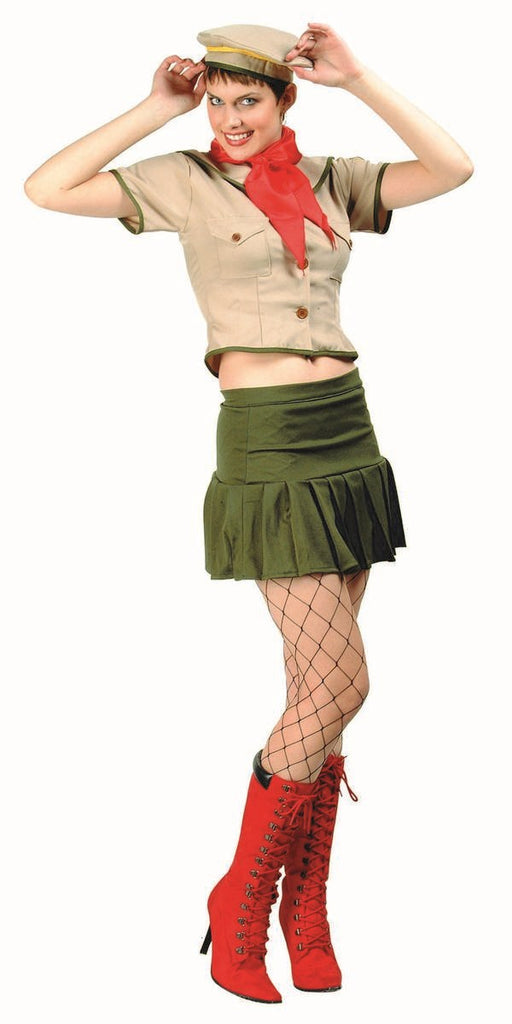
Sexy Girl Scout | Costume-Shop.com
In stock
Get ready to sell some irresistibly delicious cookies and turn heads with our Sexy Girl Scout Costume! This playful and alluring ensemble is perfec...
View full details
Original price
$31.95
-
Original price
$31.95
Original price
$31.95
$31.95
-
$31.95
Current price
$31.95
Leave a comment