DIY Guide to Making a Peter Pan Costume

Are you looking for the perfect costume for your next Halloween party or cosplay event? Look no further! In this DIY guide, we will teach you how to make your very own Peter Pan costume. Whether you're a fan of the classic Disney character or just want to channel your inner child, this costume is sure to impress. So grab your sewing kit and let's get started!
Materials Needed:
- Green fabric (enough to make a tunic and pants)
- Brown felt (for the belt and hat)
- Elastic (for the waistband and hat band)
- Fabric scissors
- Sewing machine or needle and thread
- Velcro strips
- Fabric glue
- Fabric marker or chalk
- Ruler or measuring tape
Step 1: Tunic Pattern & Cutting the Fabric
To begin, we need to create a pattern for the tunic. Take your green fabric and fold it in half lengthwise. Lay a shirt that fits you well on top of the fabric and trace around it, leaving some extra room for seams. Add an additional inch to the neckline and armholes.
Once you have your pattern drawn, cut out the tunic shape from the fabric. Be sure to cut two identical pieces since we will be sewing them together.
Step 2: Sewing the Tunic
With your fabric pieces ready, place them right sides together and pin them in place. Using a sewing machine or needle and thread, sew along the sides and bottom edge of the tunic, leaving openings for the arms and neck.
Next, fold over the neckline and armholes about half an inch and sew them down to create a clean finish. Now your tunic is starting to take shape!
Step 3: Creating the Pants
Moving on to the pants, fold your green fabric in half lengthwise once again. Place a pair of pants that fit you well on top of the fabric and trace around them, adding extra room for seams. Be sure to add an inch or two to the waistband as well.
Cut out two identical pant shapes from your fabric. Then, sew along each leg, leaving an opening at the top for inserting elastic later on.
Step 4: Making Peter Pan's Hat
To make Peter Pan's iconic hat, grab your brown felt and cut out a long strip that is wide enough to comfortably fit around your head.
Fold this strip in half lengthwise so that it forms a long rectangle. Pin it in place and sew along one of the open edges.
Once you have sewn one side shut, turn the hat right side out. Fold up one end of the rectangle to form a brim and secure it in place with fabric glue or by sewing it down.
Step 5: Adding the Finishing Touches
Now that you have all the main components of your Peter Pan costume, it's time to add some finishing touches. First, sew a strip of brown felt around the waistband of the pants to create a belt.
For the tunic, sew small strips of Velcro on both shoulders so that you can easily fasten and unfasten it. This will make it easier to put on and take off your costume.
Finally, measure your head with elastic and cut it to size. Sew or glue this elastic band onto the hat so that it fits snugly on your head.
Step 6: Don't Forget the Accessories!
No Peter Pan costume is complete without a few accessories. Consider adding a pair of green tights, brown boots, and a toy sword to really capture the essence of this beloved character.

Conclusion
Congratulations! You have successfully crafted your own Peter Pan costume from scratch. With just a little bit of sewing know-how and some creativity, you can transform yourself into everyone's favorite boy who never wants to grow up. Now go out there and show off your DIY skills at your next event!
Featured collection


Original price
$27.95
-
Original price
$27.95
Original price
$27.95
$27.95
-
$27.95
Current price
$27.95
Sexy Post Office Girl | Costume-Shop.com
In stock
Attention all aspiring letter carriers and mail enthusiasts! Prepare to deliver a package of seductive style and naughty charm with our Sexy Post O...
View full details
Original price
$27.95
-
Original price
$27.95
Original price
$27.95
$27.95
-
$27.95
Current price
$27.95


Original price
$110.95
-
Original price
$110.95
Original price
$110.95
$110.95
-
$110.95
Current price
$110.95
Northern Warrior Costume | Costume-Shop.com
Low stock
Upgrade your costume game to legendary status with the Northern Warrior Costume! Designed for rugged adventurers and fearless warriors of the North...
View full details
Original price
$110.95
-
Original price
$110.95
Original price
$110.95
$110.95
-
$110.95
Current price
$110.95
Original price
$34.95
-
Original price
$34.95
Original price
$34.95
$34.95
-
$34.95
Current price
$34.95
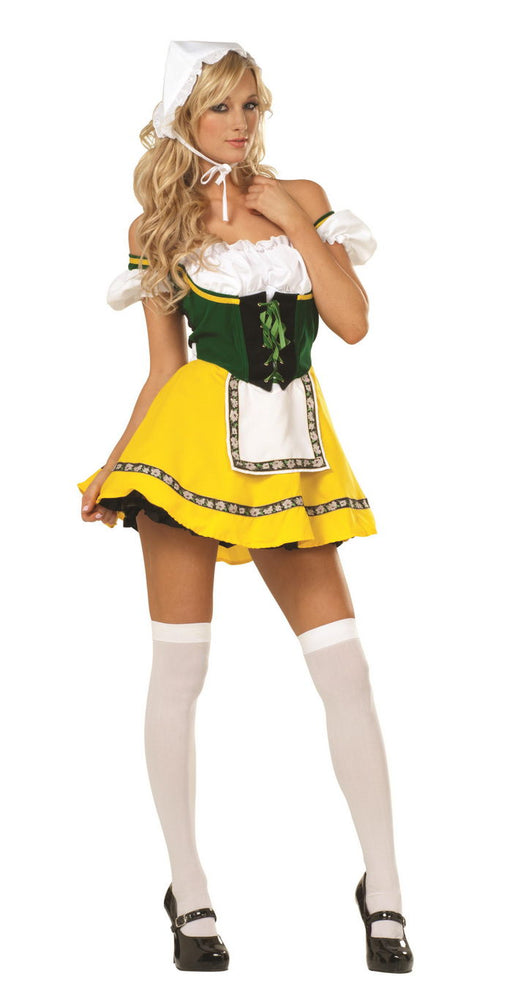
Beer Garden Babe Oktoberfest | Costume-shop.com
In stock
🇩🇪 Step into the Festivities with Bavarian Charm! Embrace the spirit of Oktoberfest in the Beer Garden Babe Costume from www.Costume-shop.com. Perf...
View full details
Original price
$34.95
-
Original price
$34.95
Original price
$34.95
$34.95
-
$34.95
Current price
$34.95
Original price
$66.95
-
Original price
$66.95
Original price
$66.95
$66.95
-
$66.95
Current price
$66.95
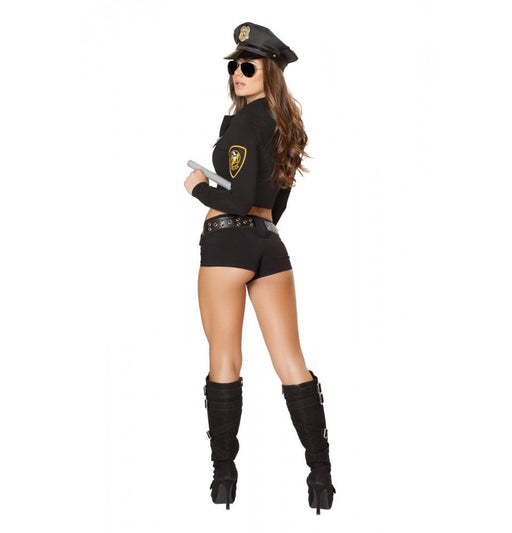
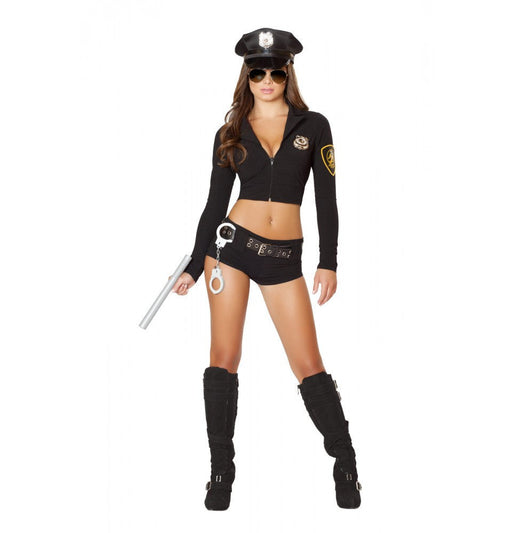
Sexy Police Officer Hottie | Costume-Shop.com
Low stock
🚓 Enforce Fun with a Dash of Flair! Step into the role of authority with the Sexy Police Officer Hottie Costume from www.Costume-shop.com. Designed...
View full details
Original price
$66.95
-
Original price
$66.95
Original price
$66.95
$66.95
-
$66.95
Current price
$66.95
Original price
$31.95
-
Original price
$31.95
Original price
$31.95
$31.95
-
$31.95
Current price
$31.95
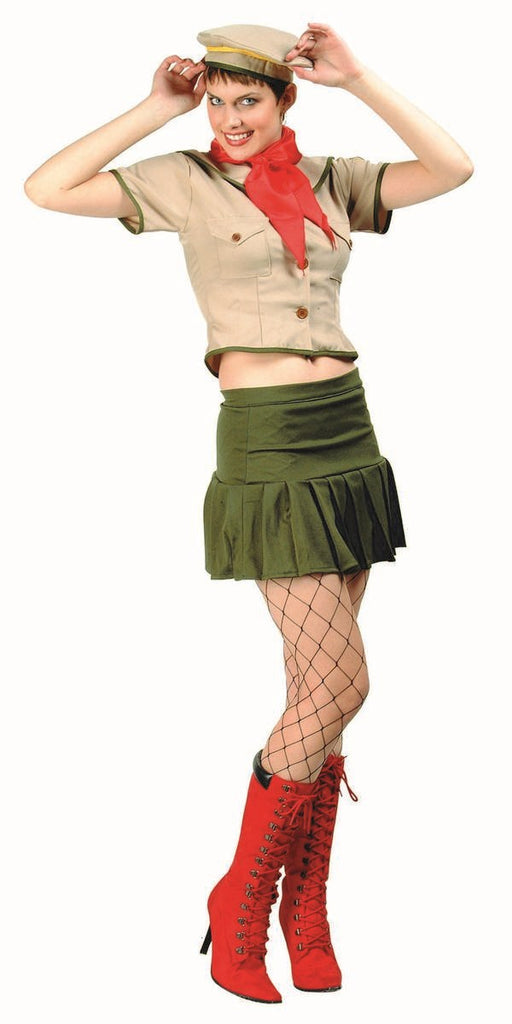
Sexy Girl Scout | Costume-Shop.com
In stock
Get ready to sell some irresistibly delicious cookies and turn heads with our Sexy Girl Scout Costume! This playful and alluring ensemble is perfec...
View full details
Original price
$31.95
-
Original price
$31.95
Original price
$31.95
$31.95
-
$31.95
Current price
$31.95
Leave a comment